

I'm pretty happy with the release of Exodus 2.0 overall, but as expected with only me testing the build prior to release, there were a few bugs in some areas I hadn't tested for awhile. There have been enough issues fixed to justify a patch release, so Exodus 2.0.1 is now available for download! Considering it was 2 years between the first two releases, I think 18 hours between these last two is a bit of an improvement. :)
Enhancements:
Bug fixes:
Exodus 2.0 has now been released! You can download the new version now on the current releases page. I'm dedicating this release to my beautiful wife Judi, and my two boisterous little boys Justin and Aiden.
As promised, Exodus is now also open source. Check out the Source Code section for instructions on how to obtain and compile the source, and information on how you can contribute code changes to the project.
This is the second official public release of Exodus, and the first since going open source. Note that the Visual C++ 2013 x64 runtimes need to be installed in order to run Exodus. The system is pre-configured to load a Mega Drive system on startup, without a TMSS system bios loaded.
The current release of Exodus is version 2.1. Download links for all required files are provided below.
Exodus requires the Microsoft Visual C++ runtime to be installed before it can run. If you're not certain you already have this installed, please download and install the runtime before attempting to run Exodus. If you get an error about a missing dll when attempting to launch, the runtime is probably not installed correctly.
Please note that although Exodus is currently setup to load an emulated Sega Mega Drive system by default, this will change in the future as support is added for more systems.
| Visual C++ 2017 x64 Runtime | Download |
| Exodus 2.1 | Download |
The compilation process for Exodus has been designed to be as simple as possible. There are however a few steps involved in getting up and running the first time, especially if you don't currently have the required tools installed. The following article will walk you through the steps for obtaining the source code for Exodus, and compiling it on your own computer.
Please note that Windows is the only supported platform for compilation. Feel free to experiment with other platforms if you wish, but no support is currently provided for this.
The sourcecode for Exodus is hosted with GitHub at https://github.com/RogerSanders/Exodus. You have two different options for downloading it to your computer: the quick and dirty way that'll get you the code in one step, but without any of the code revision history, and make it hard to pull in updates or contribute changes, or the slightly longer but proper way. I'd strongly recommend the latter. If you really just want the latest files with no fuss, the quick and dirty way is to grab the latest zip snapshot of the current development mainline from the GitHub repo.
As for the proper way, you need to have a Git client installed, and clone the repository from GitHub. There are a variety of ways to perform this task that vary between platforms, and a step by step guide is not provided here at this time. Refer to external instructions around performing a clone operation from a GitHub repo for your platform/tool of choice.
Exodus currently uses Visual Studio 2013 as its development environment. Theoretically other IDE's could be used, as long as support exists for compiling MSBuild projects, but the only officially supported IDE is Visual Studio 2013. With the recently released Visual Studio 2013 Community Edition (note: This is different from the previous Visual Studio 2013 Express Edition), you get effectively the same IDE as Visual Studio 2013 Professional, but it's free for private and open-source development. If you don't have a license for a commercial version of Visual Studio 2013, I recommend using the Community Edition.
To setup your development environment, do the following:
There are a few third party libraries that are currently required in order to build the Exodus repository. In order to obtain the required third party libraries, navigate to the "Third" directory in your local copy of the Exodus repository, and download the following files into the subdirectories that exist in that folder.
For each compressed file you've downloaded, you now need to extract each one directly into the folder it's in. IE, if the archive name was "SomeArchive.zip", and it contained a compressed folder called "SomeFolder", after you extract, you should have SomeFolder sitting in the same directory as SomeArchive.zip. (Note: Catch and htmlhelp are exceptions to this rule. Catch must appear in a subdirectory called "Catch", and htmlhelp must appear in a subdirectory called "htmlhelp".). Ensure that you fully extract ".tar.gz" files. You need to extract the contents of the .tar file within the .gz file too.
With your development environment setup, you're ready to compile Exodus. This can be done on the command line with MSBuild, but the easiest way is within Visual Studio. To compile Exodus, do the following.
Note that you can compile individual plugins under the "Debug" configuration and leave everything else as a release build. This is usually the way you'll want to work if you're developing a plugin. A full debug build runs very slowly, so you would generally compile just the individual components you want as debug, such as one or two plugins, and possibly the system itself, while leaving unrelated plugins as release builds.
Official release builds of Exodus are given a speed boost through the use of Profile Guided Optimization. This technique involves instrumenting the code during compilation, and manually running the program with that instrumentation through a series of tasks, to gather information about what areas of the code are actually bottlenecks and runtime, then feeding that information back into the linker so that it can do a smarter optimization step. This has shown to increase average performance in Exodus by a modest 15% over a standard release build. If you do a normal build of Exodus on your local machine however, this optimization will not have been applied, so you can expect to see around a 15% performance degradation compared to the official release builds. If you want to optimize your own builds, you can do the following:
As you can see, this is a fairly manual process, and takes some time to run through. I wouldn't recommend trying to instrument everything at once, because the performance will be heavily degraded and the performance profile of the emulation cores will change due to bottlenecks in the system and other cores, which will affect the usefulness of the profile data. The selection of the actual test runs is important too. If you're instrumenting a graphics core, you need to run a program which uses the features of that core, so that the various code paths can be explored and profiled at runtime. You should ideally only instrument individual assemblies, or small batches of assemblies, together in the same run. This allows you to make shorter, more focused test runs, and produces a better performance profile.
The Exodus SDK support documentation is build from XML documentation files within the repository itself. To build it yourself locally, do the following:
The created documentation files will be in the "Documentation" folder in the root of the Exodus repository
To compile the unit test projects for Exodus (only one right now), do the following:
This runtime must be installed on your computer in order to run Exodus 2.0.0 and later. Please download and install the runtime using the link provided here, or download it directly from Microsoft at the following address: http://support.microsoft.com/kb/2019667
This page provides support documentation for Exodus. No user documentation is currently available, but preliminary developer documentation is available for the Exodus API. At this time, the documentation is very incomplete, and many major sections still need to be written. This documentation will receive continual updates over the coming months, after which changes should become more stable, and mostly be associated with new changes in the API.
The Exodus SDK documentation is currently available in three formats. This documentation is current as of the 29th of April 2015.
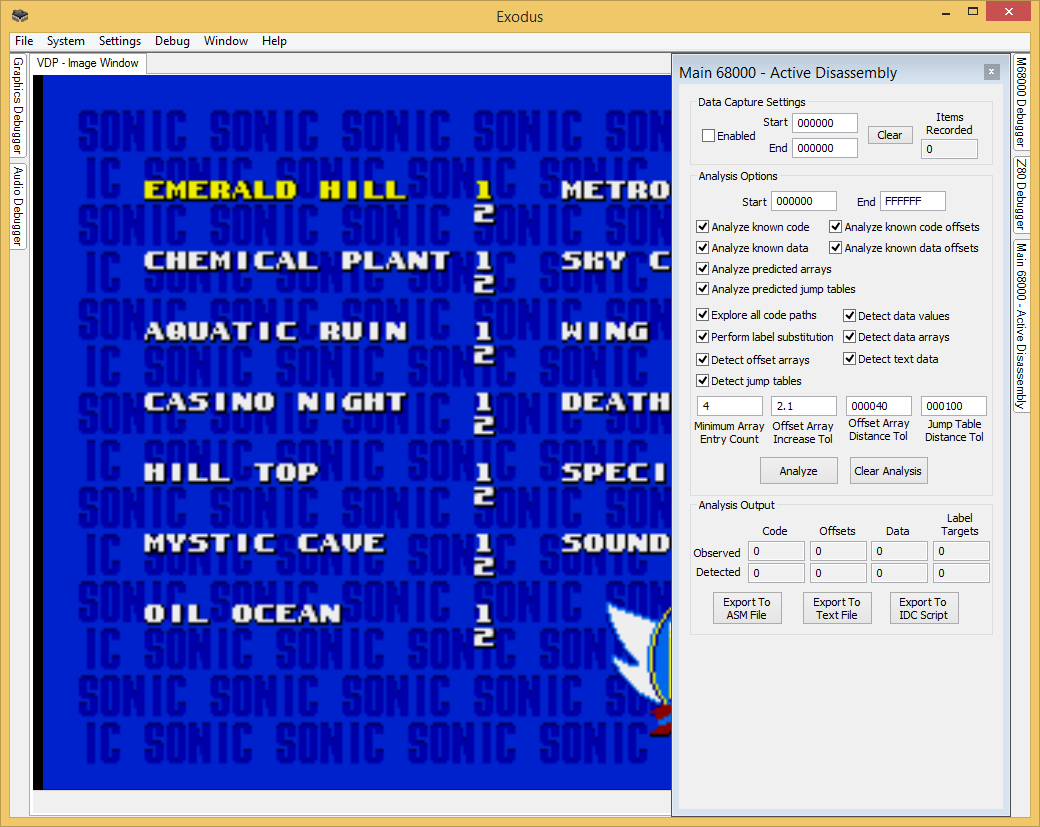
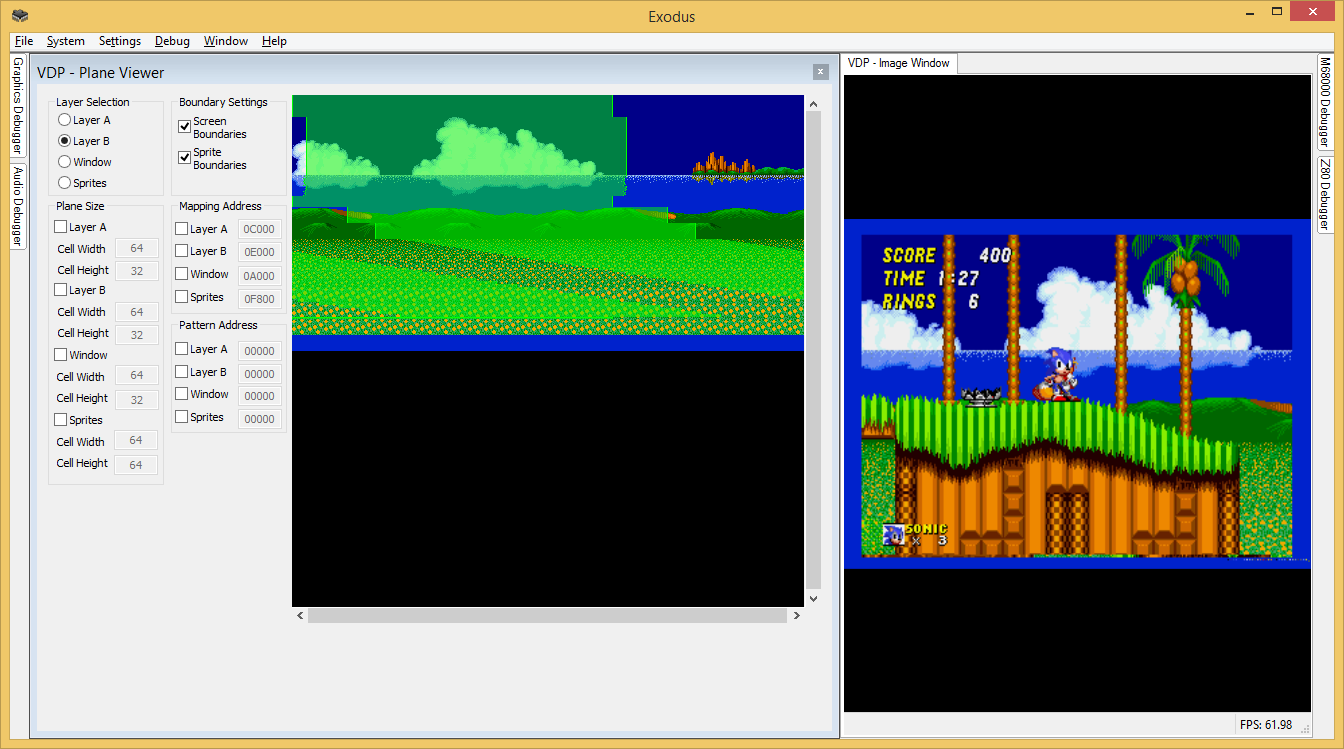
The Plane Viewer for the Mega Drive VDP shows how the scroll plane data is mapped to the screen
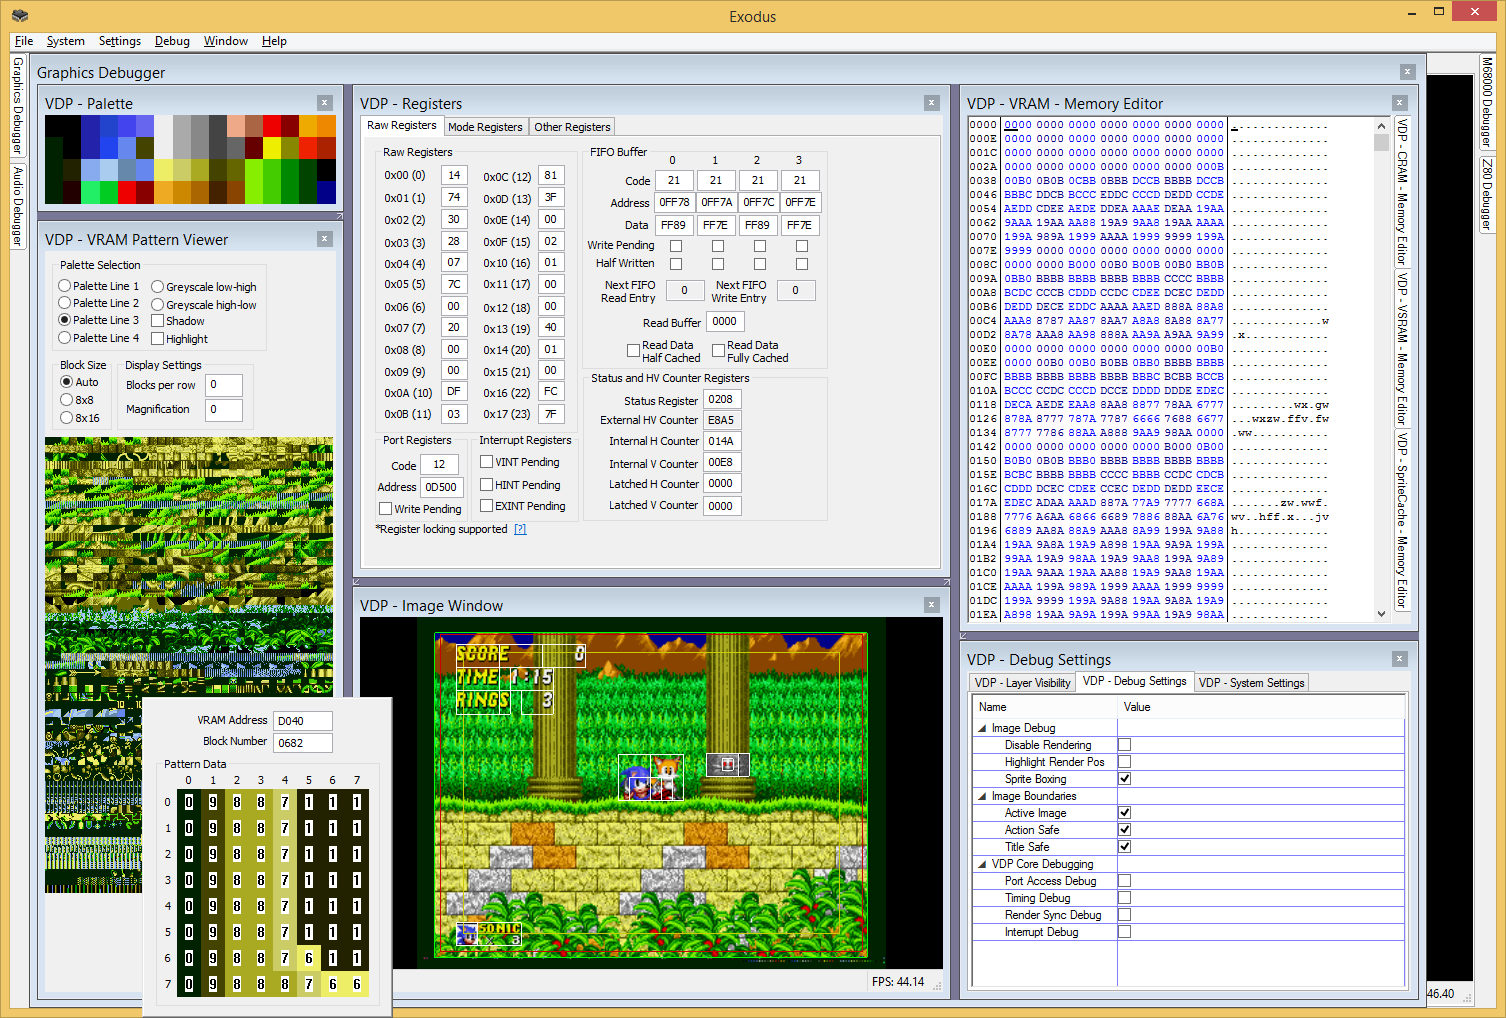
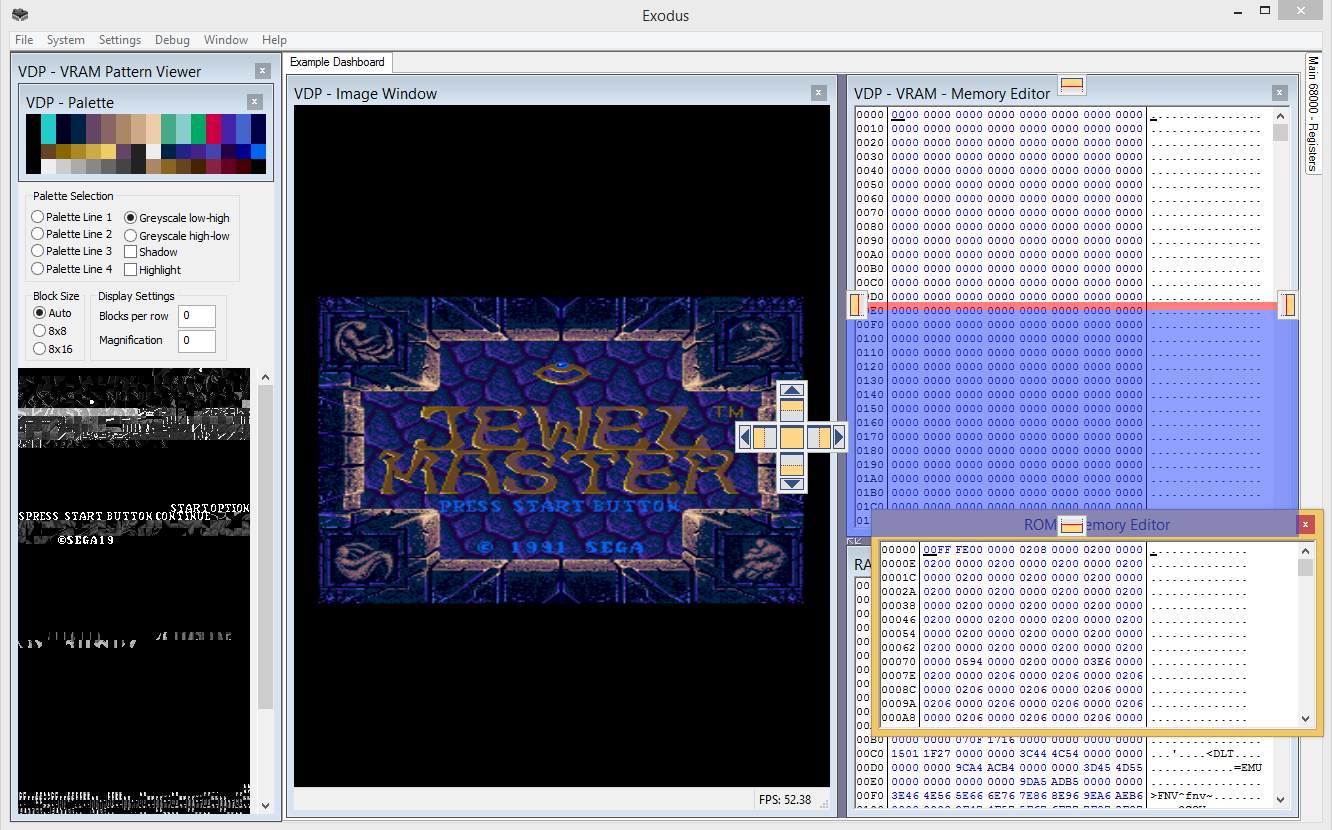
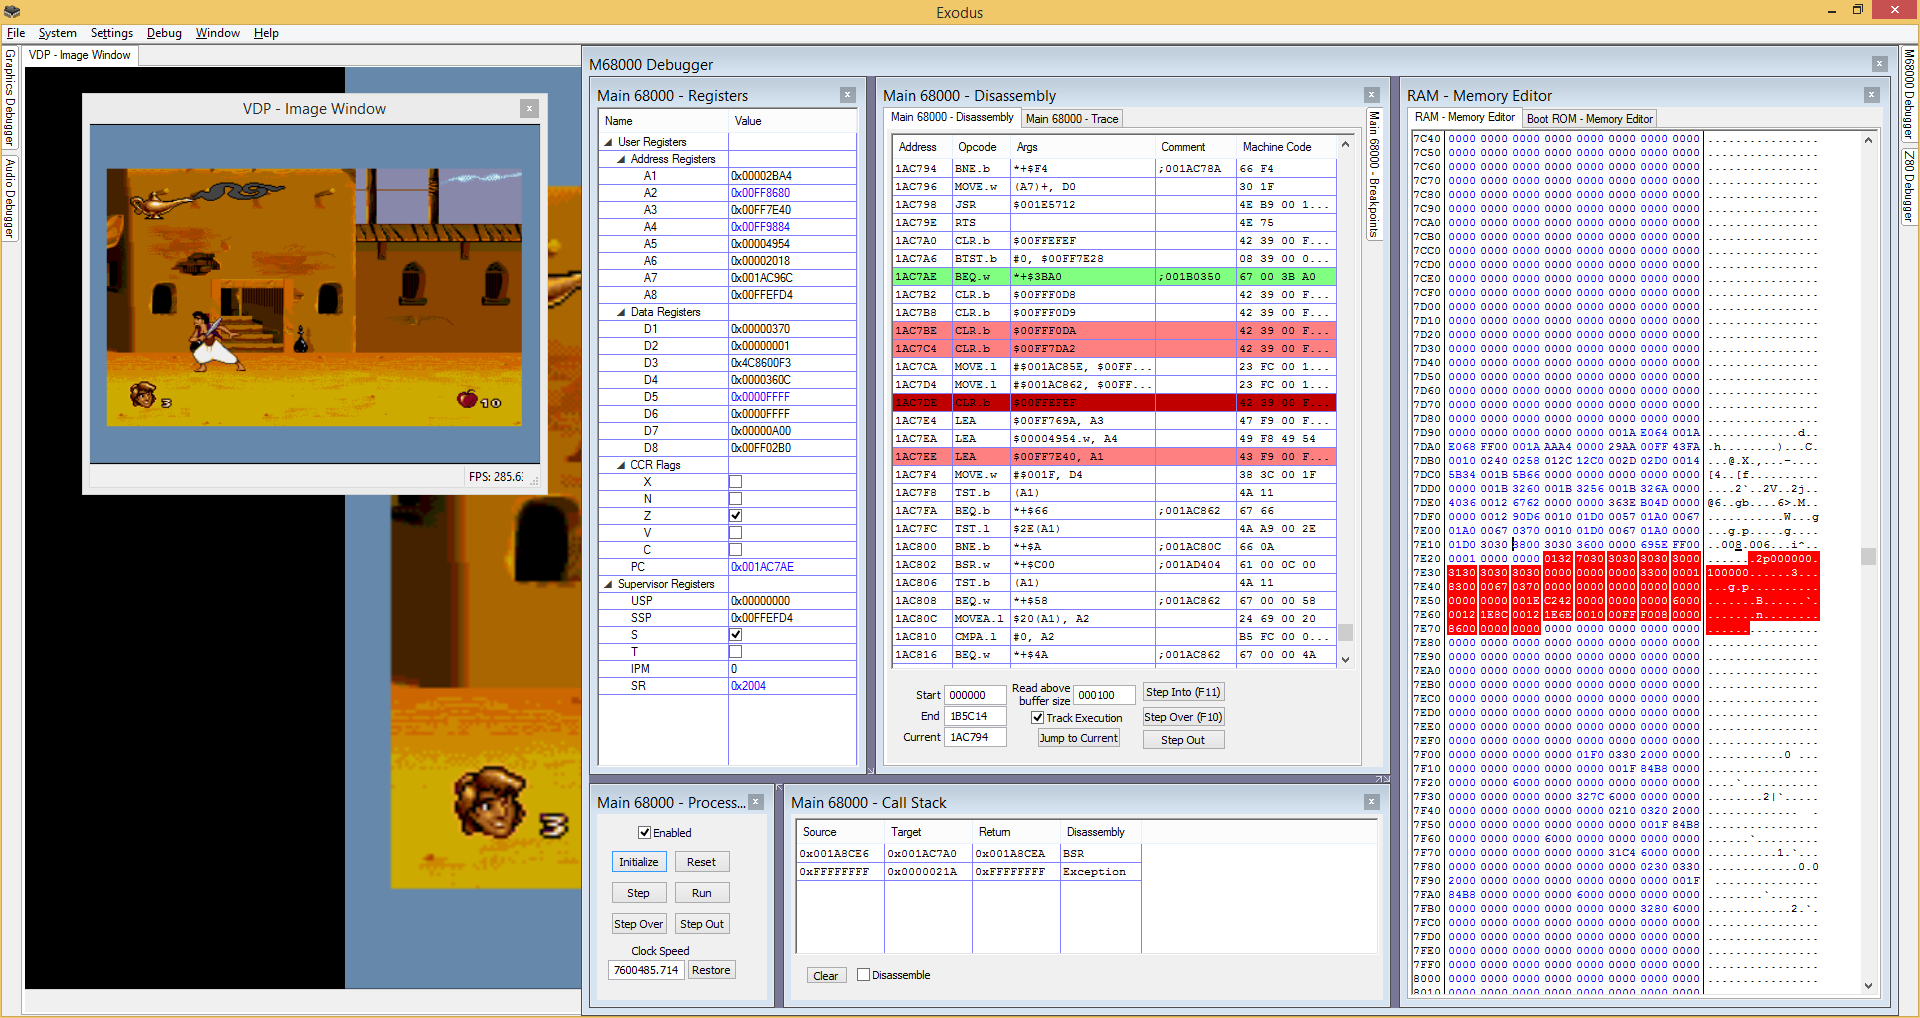
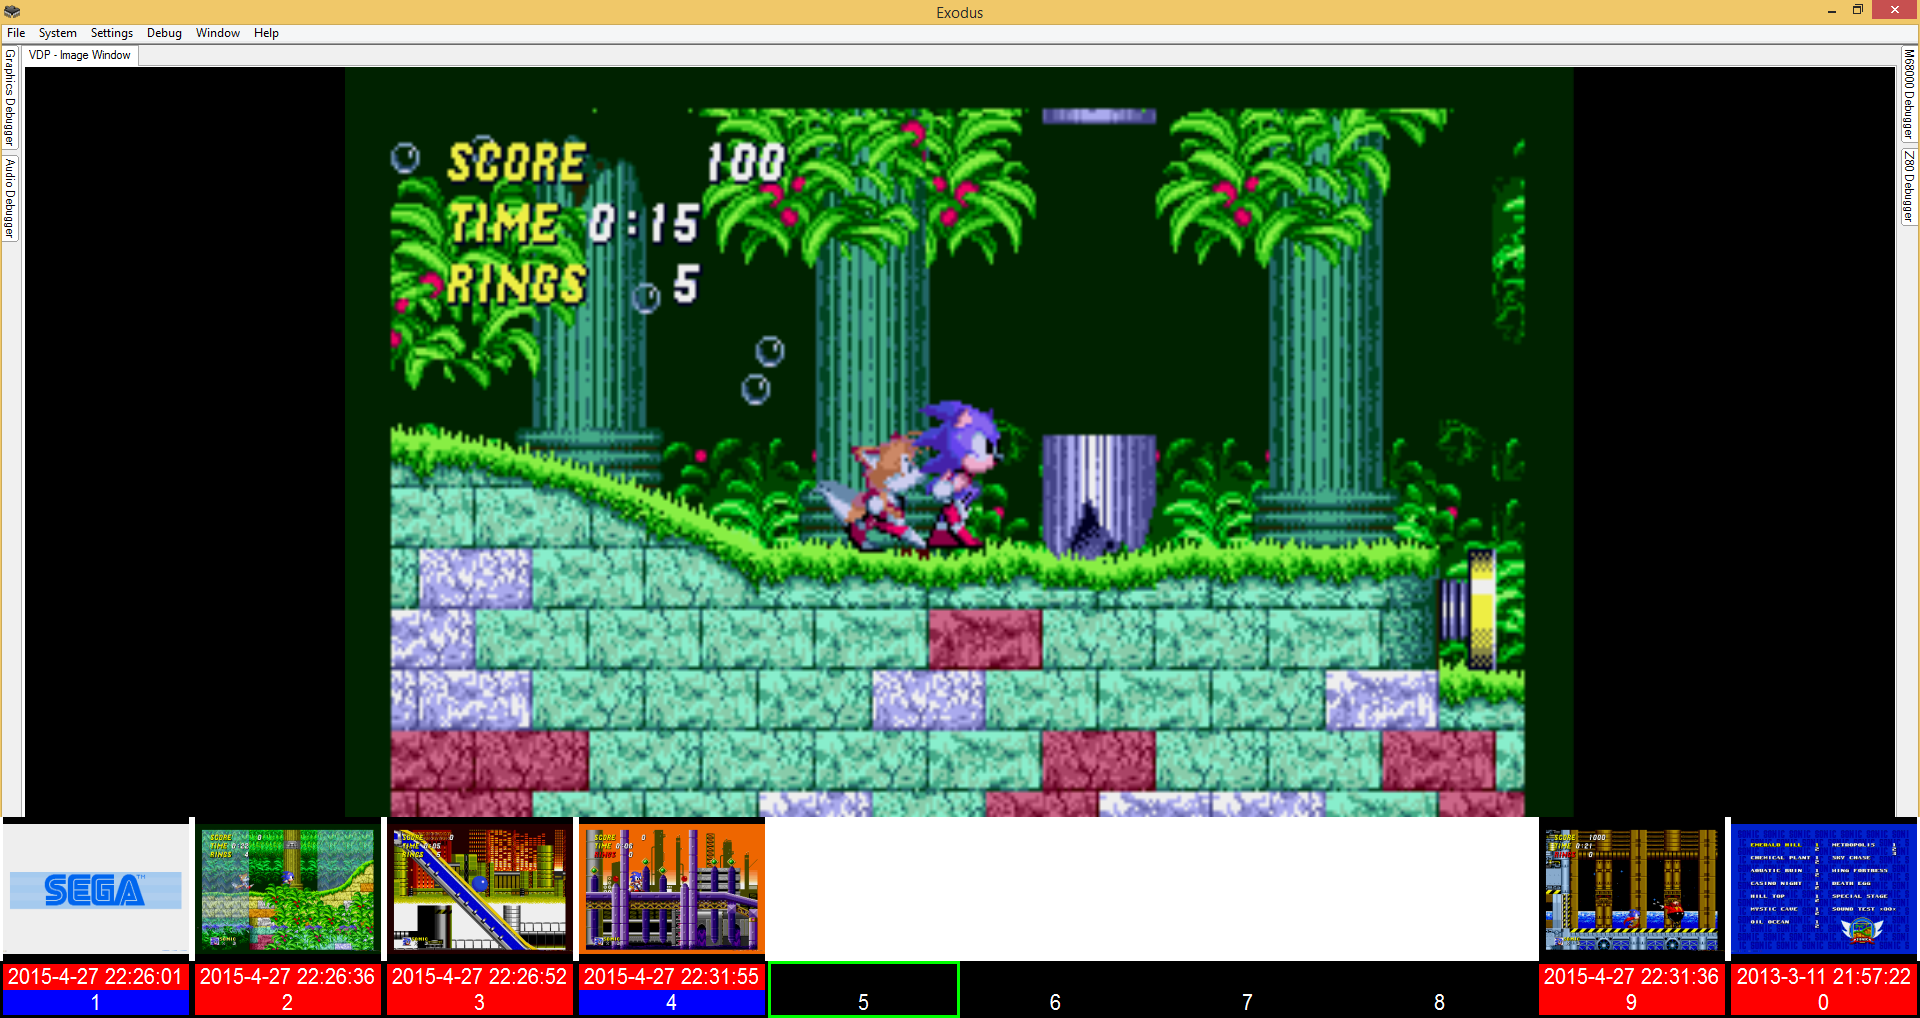
An intuitive and powerful docking system helps simplify window management
Good news, everyone! Although my previous plans to release Exodus 1.1 last year were shelved, due to a lack of time to work on the project for much of last year, things are back on track now though, and a shiny brand new 2.0 version of Exodus will now be released 30th of April 2015, exactly 2 years after the first release. This release will contain major user interface and performance improvements, as well as a lot of back-end work on the plugin model. Most importantly, I'm now ready to take the project open source. At the same time as the release, the source repository for Exodus will go live on Bitbucket.


If you wish to make a donation to show your appreciation for this project, you can do so here. Your donation may go towards the hosting costs of the website, or equipment or reference hardware to assist in the development of Exodus. It may also go towards a bunch of flowers for my beautiful wife, to say thanks for your support and patience all those nights I stayed up late working on this project.